
Crashing Witch Door Hanging
by Amanda Formaro
[originally from Kaboose.com]

Ah the crashing witch, she’s hilarious! This fun kids' craft has been on garage doors, front doors and even on the tree in your neighbor’s yard. This year, make your own crashing witch to hang on your door!
- 8” x 10” piece of cardboard
- 1 sheet of yellow felt
- Felt scraps in black, light green, purple
- 48” green yarn
- 36” raffia
- 12” twig
- Scissors
- White craft glue
- Hot glue gun
- 12” wooden dowel
- 30” craft wire
- Pencil
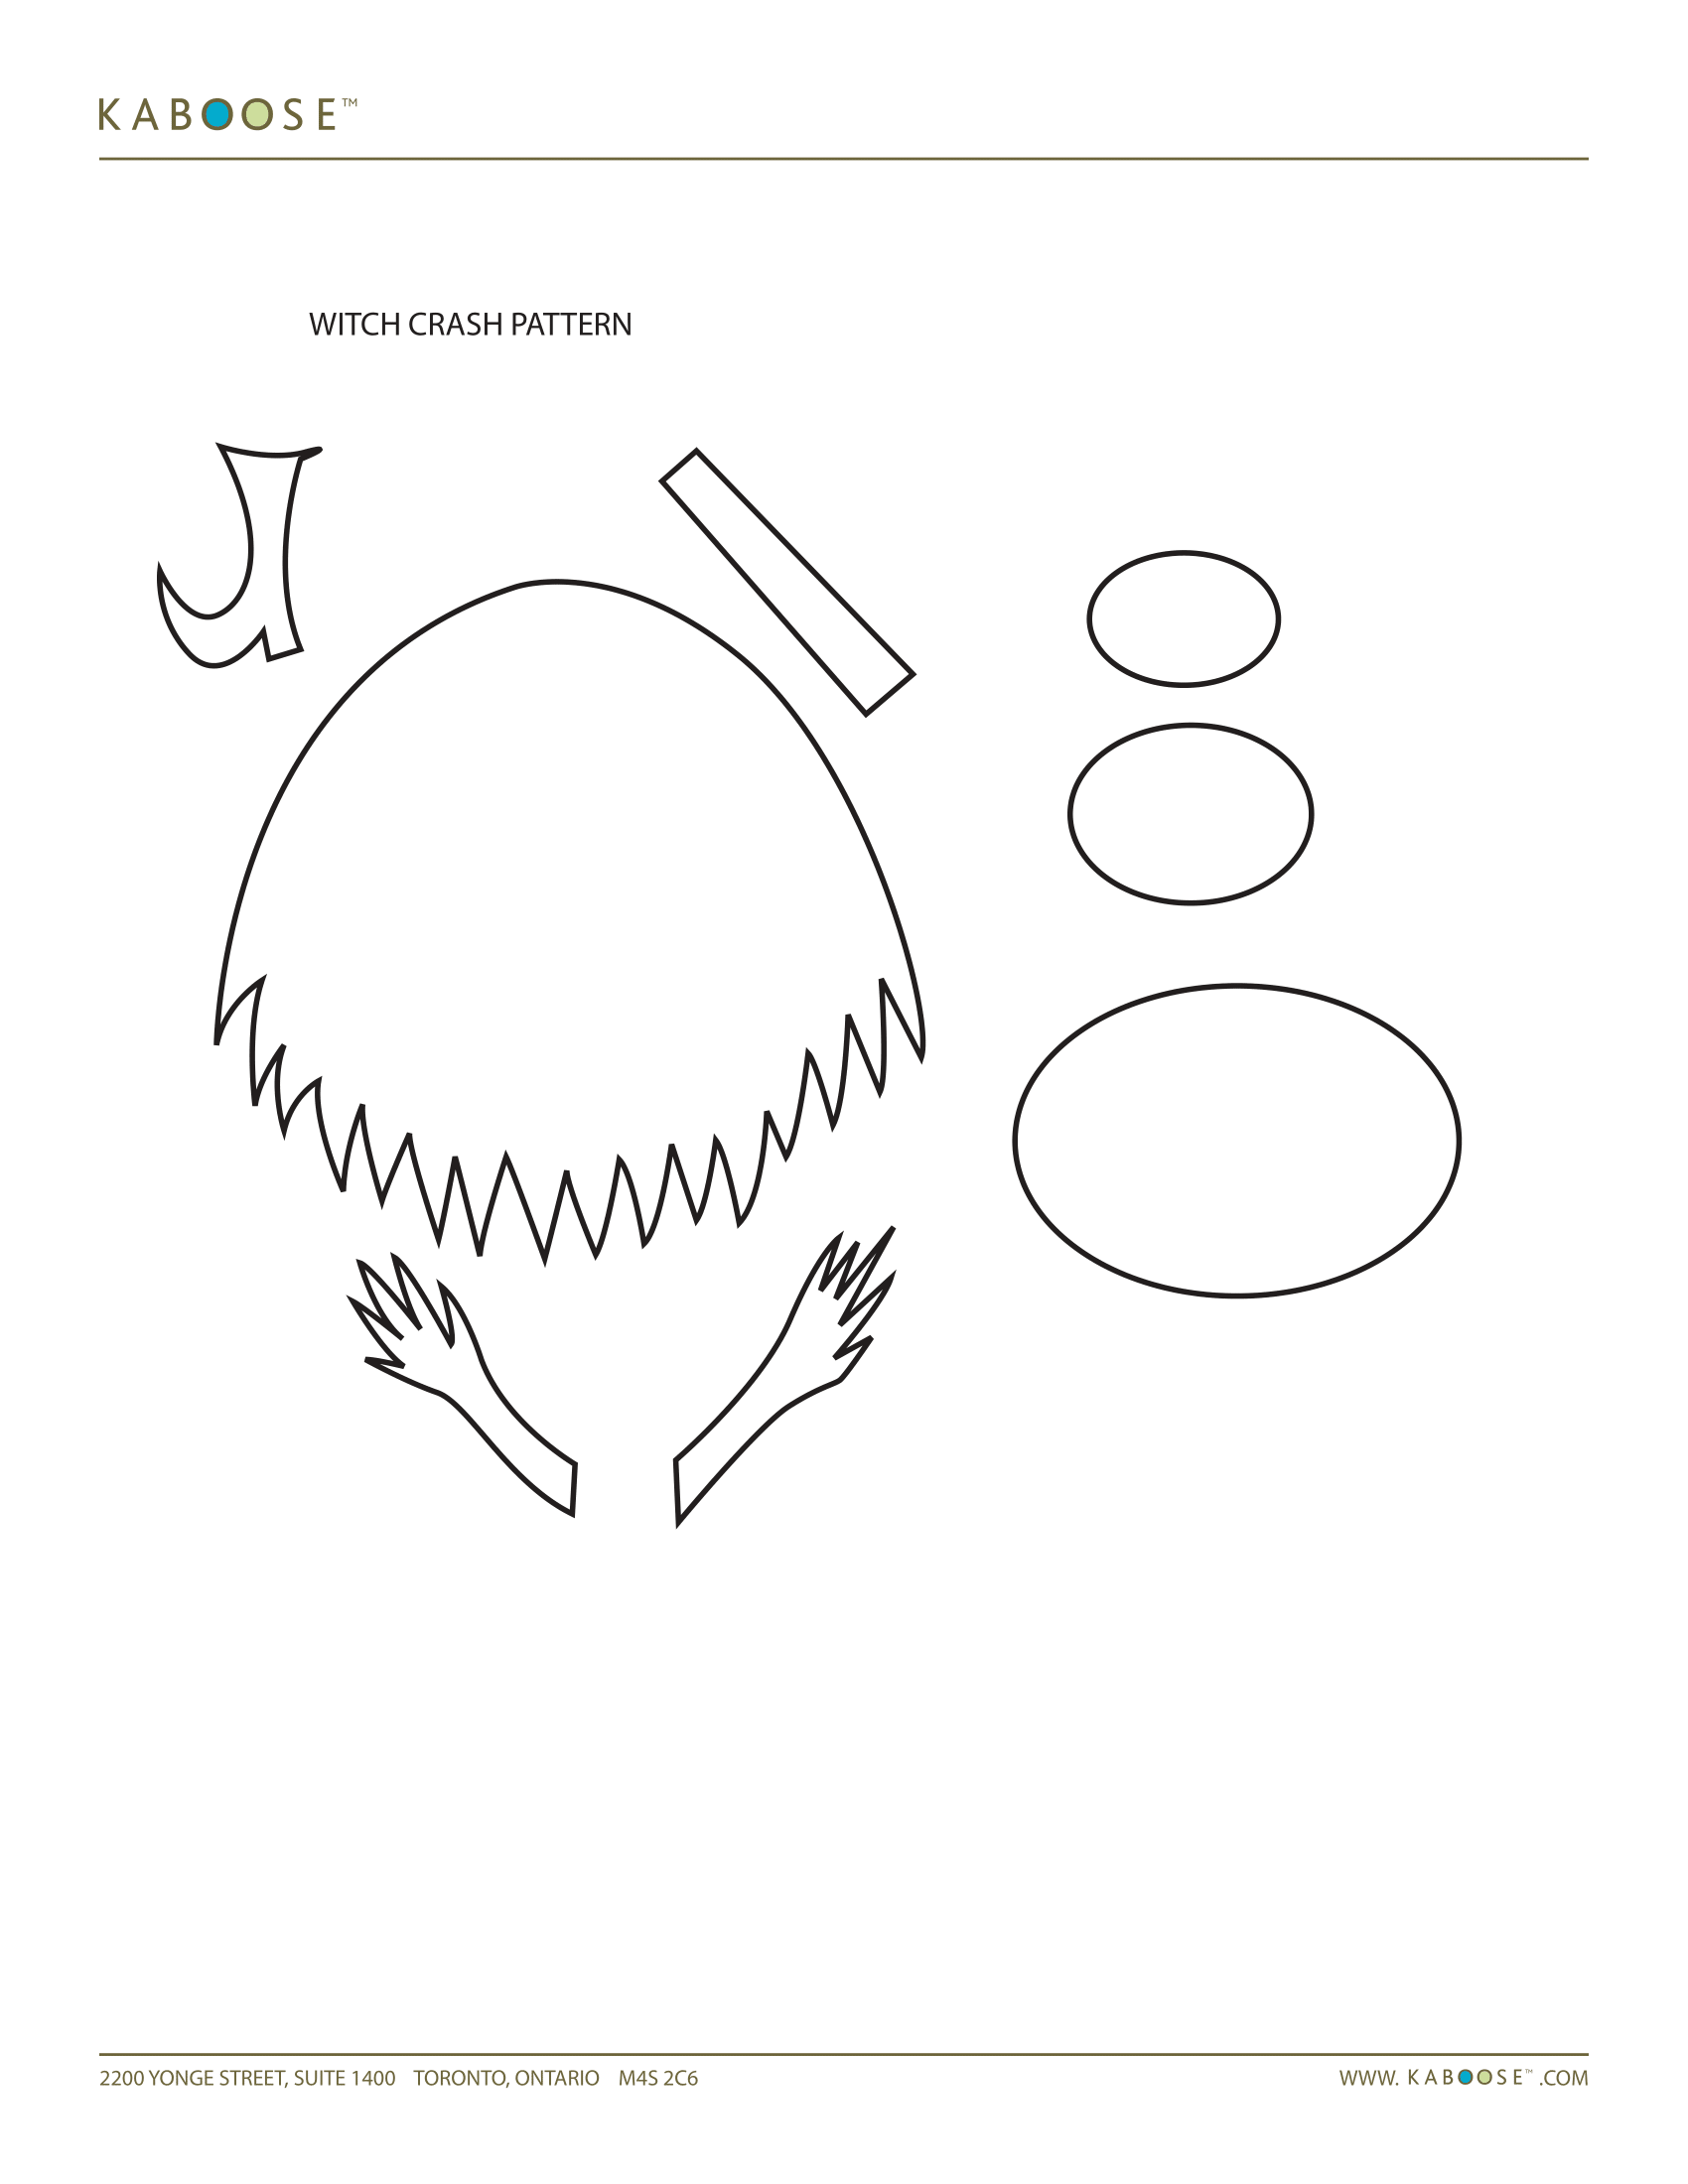
- Pattern:
How to make it:
1. Lay yellow felt flat on table, place the cardboard in the center and glue it in place with white craft glue. Set aside to dry.
2. Cut out felt pieces according to pattern: black for dress, hat, and boots; green for arms; purple for legs and hatband.
3. You will also need a piece of black felt approximately 3” x 3” to make the cone of the hat. There is no pattern for this, simply roll into a cone shape and secure with hot glue. Trim the open end so that it will stand on the table.
4. Brings the two ends of the piece of raffia together and find center. Now holding that as one piece, fold in half again, and again and again until you have a clump of raffia approximately 3-4” long.
5. Hold the raffia in the center and cut the loops at each end so that you now have many individual strands. Keep holding the raffia in the middle, carefully remove one piece and wrap it around and tie it at one end, creating your broom bristles.
6. Insert the twig into the tied end of the raffia; add a dab of hot glue to secure it in place. Set broom aside.
7. Lay pieces of the witch out onto the yellow felt. Position them before gluing anything down.
8. First glue the arms in place on to the yellow felt.
9. Lay the dress on top (do not glue yet) and position the legs. Glue the legs and down, then glue the boots overlapping the legs.
10. Lift the dress and lay the broom up the center of the felt. The top of the broom will show above the top of your witch and will stick out the bottom.
11. Place the dress over the top, overlapping the arms and legs. Hot glue the broom and the dress in place.
12. Gather the yarn as you did the raffia, creating your witch’s hair. Your final strands should be about 3” long each. Lay the hair on top of the dress, do not glue yet.
13. Position the black hat over the top of the hair, the hat should overlap the top of the dress by about ½”.
14. Once your hair and hat are where you want them, secure them with hot glue. Trim hair if needed.
15. Glue purple hatband and smaller black hat oval to the upper third of the hat. Glue the black felt cone to the top of the small black oval.
16. Hot glue your dowel to the back of the yellow felt at the top. Curl the yellow felt around the dowel and secure in place.
17. Wrap craft wire around the pencil. Slide craft wire off the pencil and stretch out, hot gluing each end to the dowel to create your hanger.
18. Let everything dry completely before hanging.
Tips:
1. If you don’t have any craft wire you can use ribbon, twine, or yarn as your hanger.
2. Try different colors. Instead of purple for your witch’s legs, be creative and make them white and red stripes!
3. Hang this on a door that is protected either by a storm door, porch cover or something else that will shield it from the elements.
