
Paper Bag Pumpkin
by Amanda Formaro
[originally from Kaboose.com]

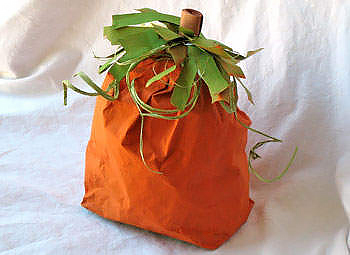
This cute kids' paper bag pumpkin craft is perfect for table decorations or, if filled with candy, a great party treat bag. They are easy to make with simple supplies for a fun Halloween craft for kids.
Things you will need:
- 1 brown paper lunch bag
- Acrylic paint: orange and leaf green
- Paintbrush
- ¼ sheet brown construction paper
- 6- 12” pieces of green raffia
- Scissors
How to make it:

1. Paint the outside of the lunch bag with orange paint.
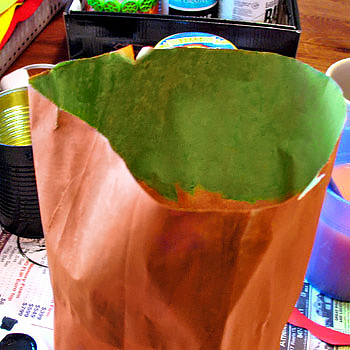
2. Paint the inside, top portion of the bag with leaf green paint.
3. Paint a second coat of orange paint on the bag, only this time, paint the top outside portion with the leaf green-colored paint.
4. When paint is completely dry, fringe the green section of the bag with your scissors, strips should be approximately ½” – 1” wide.
5. Fill bag with crumpled newspaper (if using as a decoration) or candy and treats.
6. Gather top of bag with your hand and tie a piece of raffia around it, just below the green section.
7. Continue tying pieces of green raffia around the neck of the bag until all of it has been used.
8. Cut a 1.5” wide strip of brown construction paper and roll up into a tube. Insert the tube of paper into the center of the green portion of the bag as the stem. If these bags are used as decoration, you can glue the stem in place.
Tips:
1. To reuse these decorations at Halloween, add faces as jack-o'-lanterns by gluing on yellow construction paper facial features.
2. If using these as party bags, you may want to grab all raffia pieces together and tie them into one knot to make them easier to remove rather than ripping the bag open.
3. To give the bags some weight, especially if they will be displayed outside, add a cup of sand or clean cat litter to the bottom of the bag before adding the crumpled newspaper.