
Plastic Spoon Witch
by Amanda Formaro
[originally from Kaboose.com]
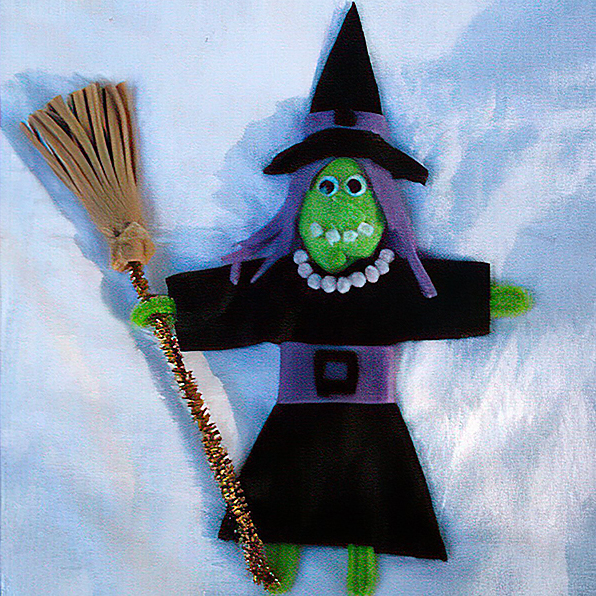
This fun plastic spoon witch craft can be as intricate or as simple as you like. Either way, your child will enjoy this Halloween kids' craft.
 What you'll need:
- Plastic spoon
- ½ sheet of lime green felt
- ½ sheet of purple felt
- 1 sheet of black felt
- ½ sheet tan felt
- Small scrap of white felt
- 1 lime green chenille stick
- 2 small wiggle eyes
- 1 miniature light green pom pom
- 10 miniature light purple pom poms
- 1 gold chenille stick
- Scissors
- Hot glue gun
- Pattern:
How to make it:
1. Cut a square of lime green felt large enough to fold over and completely cover the top portion of the spoon. Set aside.
2. Place spoon, round side facing down, on top of the green felt. Only the top section of the spoon will be wrapped, not the handle. Place a dot of hot glue onto the back of the spoon to tack it in place. Wrap the felt completely around the spoon top, gluing as you go, tucking and gluing ends of the felt into the back side of the spoon.
3. Cut out two identical dresses from the black felt. Lay one on the work surface and place spoon on top, positioning it so the top of the handle lines up with the neck. Place the other dress directly on top and tack in place at the shoulders and neck area. DO NOT glue.
4. Cut lime green chenille stick into four equal pieces. Fold each piece in half. Insert, open end inward so that loops are sticking out (these are the arms and legs) and glue in place. Now glue the rest of the dress together.
5. Cut a strip of purple felt for the belt, wide enough to cover the waist area. Tack seams in the back. Cut a square from the black felt for the buckle. Cut a smaller square out of the center of the larger square and set the small piece aside to use on the hat. Glue buckle to the front of the belt.
6. To make the hair, cut a four inch by three inch rectangle from purple felt. Use scissors to fringe one of the long sides. Tack to the back of the “head”, lining up the center of the felt hair with the top third of the spoon. Wrap hair around the head and trim where needed. Glue in place. Note: You’ll want to leave about a quarter-inch gap around the forehead area.
7. Cut two identical hats from the black felt. Just as you did with the dress, lay one hat on the work surface, place the head on top and then arrange the second hat on top of the head. Line up hats and glue in place.
8. Cut a skinny strip of purple felt out for the hat band and glue in place as you did with the dress belt. Glue the small black square you cut from the belt buckle to the center of the hat band.
9. Add a necklace by piping some hot glue around the neckline of the dress and place light purple miniature pom-poms in place.
10. Cut a small point nose from the lime green felt and glue just the large end of it to the center of the face so that the it sticks out a bit.
11. Cut out a tiny strip of white felt and cut it into four small squares. Glue on for the mouth.
12. Glue on a miniature green pom-pom near her chin to create a wart. Glue on two wiggle eyes.
13. Cut an eight inch by three inch rectangle from the tan felt. Use scissors to fringe one end, about two inches inward. Roll up the felt to create the broom bristles and glue together as you roll. Insert gold chenille stems into the bottom end of the bristles and glue in place. Tie a thin strip around the base of the broom and trim the ends. Insert the bottom of the broom handle through the loop hand and down to the foot. Tack with glue to the hand and the foot.